

How to Take a Screenshot on a Mac: Complete Guide to MacBook and iMac
Written By Dilshad AhmadPublished: 11 October 2026 • 11:34 AM IST
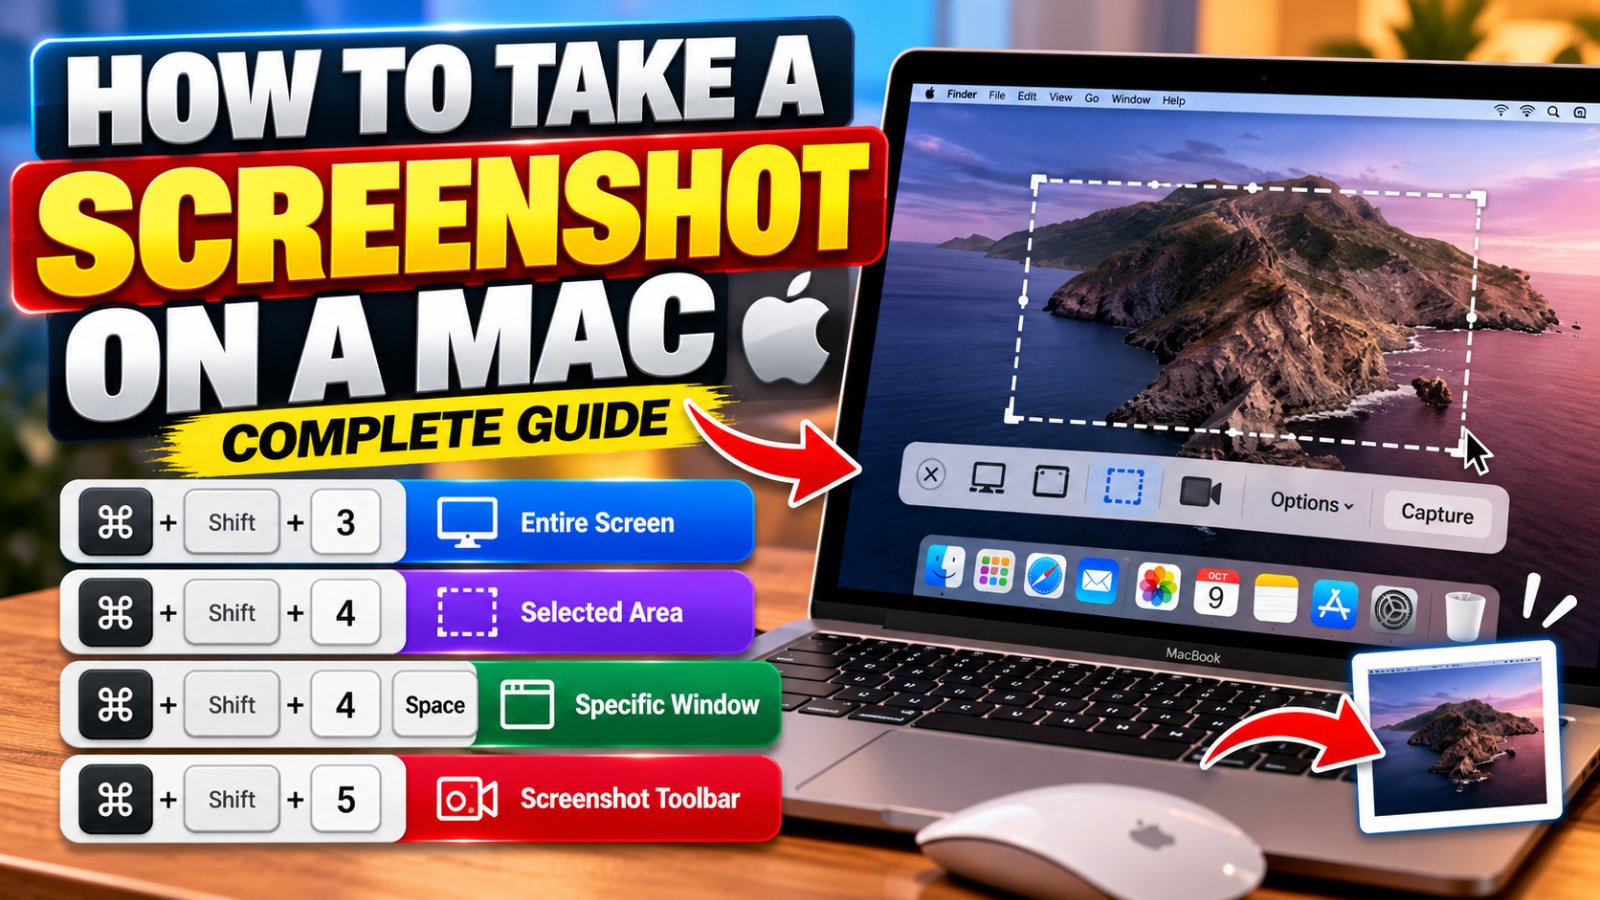
How to Take a Screenshot on a Mac: Complete Guide to MacBook and iMac
Taking a screenshot on a Mac is simple once you know the correct keyboard shortcuts. Whether you use a MacBook Air, MacBook Pro, Mac mini or iMac, macOS includes built-in tools that let you capture the entire screen, a specific window or just a selected portion of your display.
You do not need to install an additional application for basic screenshots. You can use keyboard shortcuts to capture your screen in seconds, edit the resulting image, copy it to your clipboard or change where macOS saves screenshots.
In this guide, you will learn how to screenshot on a Mac, which keyboard shortcuts to use, where screenshots are stored, how to capture a particular window and how to fix common screenshot problems.
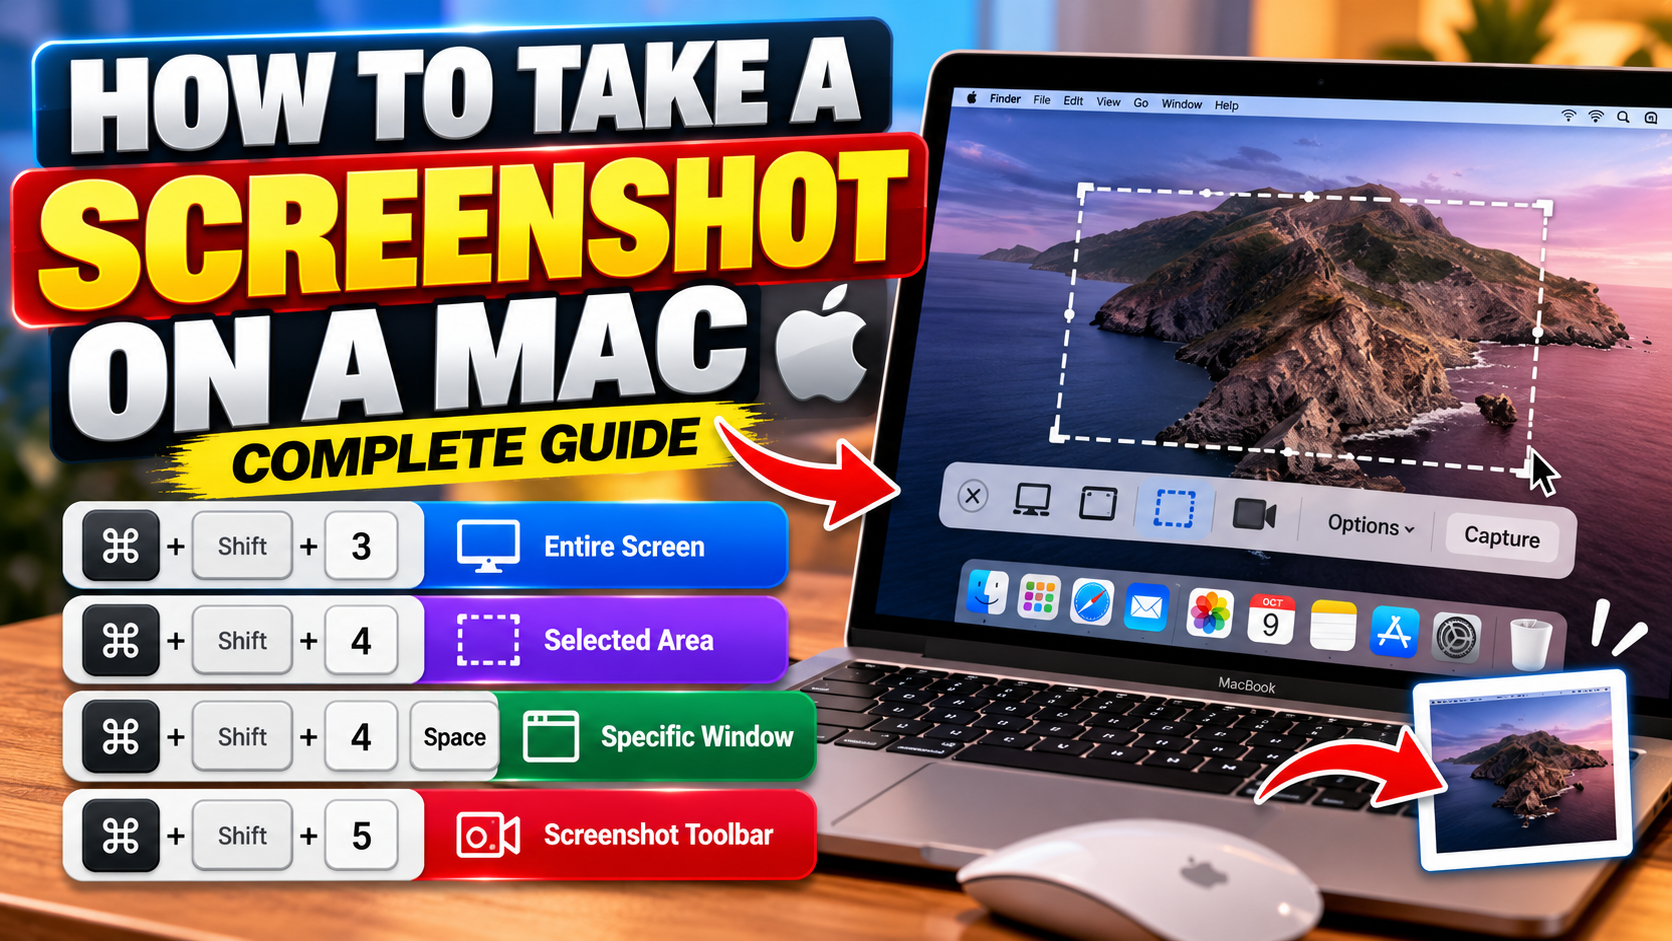
- Entire screen: Shift + Command + 3
- Selected area: Shift + Command + 4
- Specific window: Shift + Command + 4, then press Space
- Screenshot and screen recording toolbar: Shift + Command + 5
- Save a screenshot to the clipboard: Add the Control key to the relevant shortcut.
These are Apple's standard screenshot shortcuts. Their availability can depend on your keyboard configuration and macOS settings.
1. How to Take a Full-Screen Screenshot on a Mac
If you want to capture everything visible on your Mac display, use the full-screen screenshot shortcut. This is useful when saving an entire webpage view, recording an application layout for reference or sharing an error message with technical support.
Steps to Capture the Entire Screen
- Open the screen you want to capture.
- Press and hold the Shift key and the Command (⌘) key.
- While holding them, press 3.
- Release all the keys.
- Look for the screenshot thumbnail that may appear in the corner of your display.
- Click the thumbnail if you want to edit the image, or wait for the screenshot to be saved automatically.
By default, screenshots are generally saved to your Mac's desktop. If you have changed the save location in the Screenshot toolbar, the file will be saved to the selected destination instead.
Shift + Command + 3
Use this shortcut when you want to capture the entire screen without manually selecting an area.
2. How to Screenshot a Selected Area on a Mac
Sometimes you do not want to capture the entire display. For example, you might want to save a paragraph, a chart, a section of a website or an error message without including everything else on the screen.
macOS lets you select a specific rectangular area before taking the screenshot.
Steps to Capture Part of the Screen
- Open the content you want to capture.
- Press Shift + Command + 4.
- Your pointer will change into a crosshair.
- Click and drag to select the area you want to capture.
- Release the mouse button or trackpad to take the screenshot.
- Open the thumbnail if you want to edit the image.
This shortcut is especially useful for creating tutorials, sharing selected information, documenting software problems or capturing only the relevant part of a webpage.
How to Cancel a Selected-Area Screenshot
If you select the wrong area or change your mind, press the Esc key before completing the capture. This cancels the selection process.
How to Move the Selected Screenshot Area
After starting the selection with Shift + Command + 4, click and drag to create the capture area. While adjusting it, hold the Space bar to move the selected rectangle without changing its size. Release the Space bar when you have positioned the selection correctly.
Shift + Command + 4
Use this shortcut when you need to capture only a particular portion of the screen.
3. How to Take a Screenshot of One Window on a Mac
If you want to capture a single application window without manually drawing a selection, macOS offers a convenient window-capture option.
This method is helpful when capturing a Finder window, a browser window, an application panel or another supported window.
Steps to Capture a Window
- Open the application window you want to capture.
- Press Shift + Command + 4.
- Press the Space bar.
- Your pointer will change into a camera icon.
- Move the camera pointer over the window you want to capture.
- Click the window to take the screenshot.
macOS normally captures the selected window with its shadow. If you want to exclude the shadow, hold the Option key while clicking the window.
Some applications may restrict screenshots of their content, so this method may not work in every application or window.
Shift + Command + 4, followed by Space
The camera pointer lets you select a window instead of drawing a rectangular selection.
4. How to Use the Screenshot Toolbar on a Mac
If you prefer a visual menu instead of remembering several keyboard shortcuts, use the built-in macOS Screenshot toolbar. It provides options for capturing the screen, capturing a window, selecting an area and recording screen activity.
How to Open the Screenshot Toolbar
- Press Shift + Command + 5.
- Wait for the Screenshot controls to appear on the screen.
- Choose the tool for the entire screen, a selected window or a selected portion.
- Open Options if you want to change the save location, timer or other available settings.
- Click Capture to take the screenshot.
On supported macOS versions, the toolbar also provides screen-recording options. These let you record the entire screen or a selected portion rather than taking a still image.
| Toolbar Option | What It Does |
|---|---|
| Capture Entire Screen | Captures the full display. |
| Capture Selected Window | Captures one selected window. |
| Capture Selected Portion | Captures a rectangular area you choose. |
| Record Entire Screen | Records activity across the full screen. |
| Record Selected Portion | Records activity within a selected area. |
| Options | Provides available settings for saving, timing and other capture preferences. |
Important: The Screenshot toolbar is available on macOS Mojave 10.14 and later. Some options may vary by macOS version.
5. Where Are Screenshots Saved on a Mac?
By default, macOS saves screenshots to the desktop. The filenames typically begin with Screenshot or Screen Shot, followed by the date and time. The exact filename format can vary by system language and macOS version.
If you cannot find a screenshot on your desktop, the save location may have been changed in the Screenshot toolbar.
How to Change the Screenshot Save Location
- Press Shift + Command + 5.
- Click Options in the Screenshot toolbar.
- Find the Save to section.
- Select one of the available locations, such as Desktop, Documents or Clipboard, where offered.
- If you want a different folder, choose the option to select another location when available.
Future screenshots will use the selected destination until you change the setting again.
6. How to Copy a Screenshot on a Mac Without Saving a File
If you want to paste a screenshot directly into an email, document, message or image editor, you can capture it to the clipboard instead of saving it as a separate file.
To do this, add the Control key to the screenshot shortcut you want to use.
| Action | Shortcut |
|---|---|
| Copy the full screen | Control + Shift + Command + 3 |
| Copy a selected area | Control + Shift + Command + 4 |
After capturing the image, open the destination application and press Command + V to paste it.
You can also Control-click the floating screenshot thumbnail and choose the clipboard option when that menu is available.
7. How to Edit a Screenshot on a Mac
macOS lets you open the screenshot thumbnail immediately after taking a capture. This gives you a convenient way to make basic edits without opening a separate image editor.
Depending on the macOS version and available tools, you may be able to:
- Crop the image to focus on important content.
- Add annotations or markings.
- Draw attention to a particular area.
- Save the edited image.
- Share the screenshot with another application or person.
Steps to Edit a Screenshot
- Take a screenshot using one of the keyboard shortcuts.
- Click the floating thumbnail before it disappears.
- Use the available editing or Markup tools.
- Make the changes you need.
- Save or share the edited image.
If you miss the thumbnail, locate the screenshot in its saved folder and open it using an application that supports image editing.
8. How to Take a Screenshot on a MacBook Air or MacBook Pro
The standard screenshot shortcuts generally work on MacBook Air and MacBook Pro models running supported versions of macOS. You do not need a separate screenshot application for normal screen captures.
The most useful shortcuts are:
- Shift + Command + 3: Capture the entire screen.
- Shift + Command + 4: Select a portion of the screen.
- Shift + Command + 4, then Space: Capture a particular window.
- Shift + Command + 5: Open the Screenshot toolbar.
If a shortcut does not work, check whether your keyboard shortcuts have been changed in macOS settings. Also confirm that you are pressing the Command key rather than the Control key when using the standard capture shortcuts.
9. How to Take a Screenshot on an iMac
Taking a screenshot on an iMac follows the same basic process as on a MacBook. Use the built-in keyboard shortcuts or open the Screenshot toolbar.
- Display the content you want to capture.
- Press Shift + Command + 3 for the entire screen.
- Use Shift + Command + 4 to select an area.
- Use Shift + Command + 5 to open the Screenshot toolbar.
- Locate the saved image in the selected destination.
If your iMac uses a third-party keyboard, make sure the keys assigned to Command and other modifier keys are configured correctly.
10. Why Is My Mac Screenshot Shortcut Not Working?
If pressing a screenshot shortcut does not produce an image, the problem may be related to keyboard settings, a changed shortcut, the save destination or an application restriction.
Check the Keyboard Shortcut Settings
Open the Apple menu and go to System Settings. Select Keyboard, then open Keyboard Shortcuts and look for the screenshots section. The exact labels may differ depending on your macOS version.
Check whether the screenshot shortcuts are enabled and whether another shortcut has been assigned.
Check the Save Location
Press Shift + Command + 5 and open Options. Make sure screenshots are being saved to the location you expect. If the destination is Clipboard, the screenshot may be copied for pasting instead of appearing as a new file on your desktop.
Restart Your Mac
If the Screenshot toolbar or keyboard shortcuts stop responding, save your work and restart your Mac. Then try the shortcut again.
Check Whether the Application Restricts Screenshots
Some applications may prevent screenshots of certain content. If screenshots work elsewhere but not in one particular application, the restriction may be related to that application rather than a problem with your Mac.
Mac Screenshot Shortcuts: Quick Reference Table
| What You Want to Do | Keyboard Shortcut |
|---|---|
| Capture the entire screen | Shift + Command + 3 |
| Capture a selected area | Shift + Command + 4 |
| Capture a specific window | Shift + Command + 4, then Space |
| Open screenshot and recording controls | Shift + Command + 5 |
| Copy a full-screen capture to the clipboard | Control + Shift + Command + 3 |
| Copy a selected-area capture to the clipboard | Control + Shift + Command + 4 |
Frequently Asked Questions
What is the shortcut to take a screenshot on a Mac?
The standard shortcut for a full-screen screenshot is Shift + Command + 3. Use Shift + Command + 4 to select a portion of the screen.
How do I screenshot only part of my Mac screen?
Press Shift + Command + 4, then click and drag over the area you want to capture. Release the mouse button or trackpad to take the screenshot.
Where do screenshots go on a Mac?
Screenshots are saved to the desktop by default, but the destination can be changed through Options in the Screenshot toolbar.
How do I take a screenshot on a Mac without saving it to the desktop?
Add the Control key to the relevant screenshot shortcut to copy the capture to the clipboard. You can then paste it into a supported application using Command + V.
Can I take a screenshot of just one window?
Yes. Press Shift + Command + 4, press Space, and click the window you want to capture.
How do I record my Mac screen instead of taking a screenshot?
Press Shift + Command + 5 to open the Screenshot toolbar. Choose one of the screen-recording options, select the area if needed, and click Record.
Can I change where Mac screenshots are saved?
Yes. Open the Screenshot toolbar using Shift + Command + 5, select Options and choose a different save destination from the available options.
Why is my Mac not taking screenshots?
Check the keyboard shortcut settings, confirm the save destination and restart your Mac if necessary. Some applications may restrict screenshots of certain content.
Final Thoughts
Taking a screenshot on a Mac is easy once you remember a few keyboard shortcuts. Use Shift + Command + 3 for the entire screen, Shift + Command + 4 for a selected area and Shift + Command + 5 for the Screenshot toolbar.
These built-in tools work for common screenshot tasks on MacBook Air, MacBook Pro and iMac models. You can also change the save destination, copy screenshots to the clipboard and use the available editing tools to prepare images for emails, documents, tutorials and technical support requests.
Official Apple Resources
- Apple Support: Take a Screenshot on Your Mac
- Apple Support: Keyboard Shortcuts on Your Mac
- Apple Support: Take Screenshots or Screen Recordings on Mac