

How to Tie a Tie Step by Step: Easy Guide for Beginners
Written By Dilshad AhmadPublished: 11 October 2026 • 03:24 PM IST
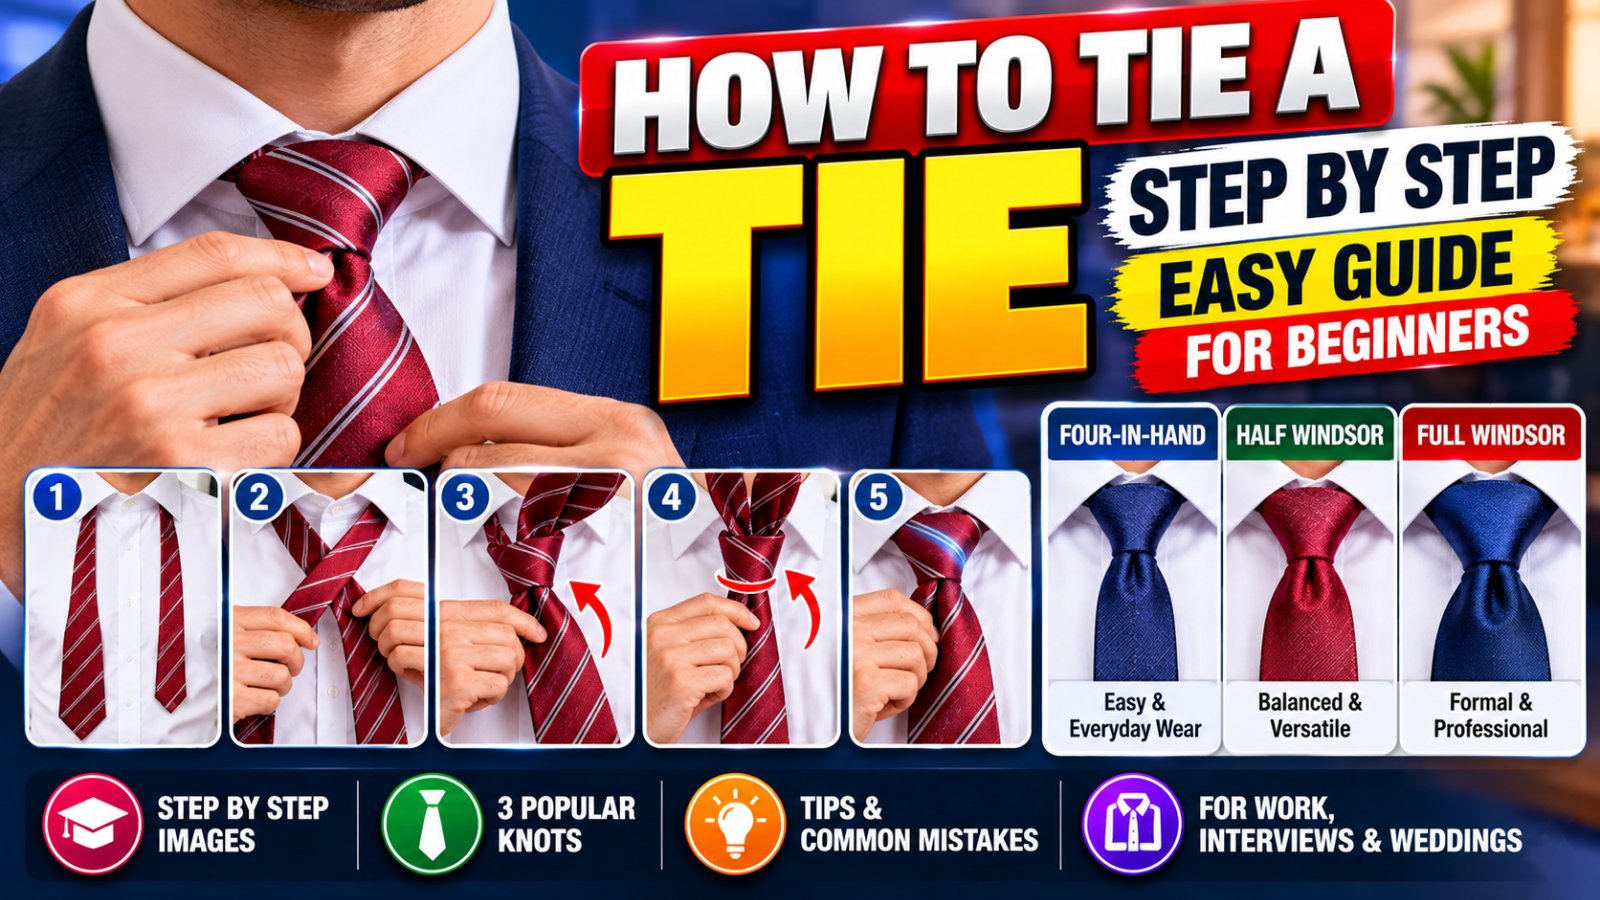
Learning how to tie a tie step by step is easier than it looks. Whether you need a tie for a job interview, a business meeting, a wedding, or a formal dinner, you can create a neat, professional knot with a few simple movements. The key is to position the tie correctly, follow the knot instructions in order, and adjust the finished knot so it sits comfortably beneath your shirt collar.
If you are a beginner, start with the Four-in-Hand knot. It is relatively easy to learn and creates a slim, slightly asymmetrical finish. Once you are comfortable with it, you can try the Half Windsor for a more balanced appearance or the Full Windsor for a wider, more symmetrical knot.
Quick Answer: How to Tie a Tie
- Place the tie around your neck with the wide end longer than the narrow end.
- Cross the wide end over the narrow end.
- Wrap the wide end around the narrow end according to your chosen knot.
- Bring the wide end through the loop near your collar.
- Pass it through the front loop of the knot.
- Pull gently to tighten, center the knot, and adjust the tie length.
Beginner tip: The Four-in-Hand knot is a good starting point because it uses fewer steps than a Full Windsor.
What You Need Before Tying a Tie
You do not need special equipment to tie a traditional necktie. A regular necktie, a dress shirt, and a mirror are enough to get started.
- A necktie: Choose a tie that works with your shirt and outfit.
- A dress shirt: Button the shirt and raise the collar before starting.
- A mirror: This helps you see whether the knot is centered and the tie is straight.
- A little patience: Your first attempt may not look perfect. Practicing a few times makes the movements easier to remember.
Stand comfortably in front of a mirror. Place the tie around your neck with the front side of the fabric facing outward. Leave the narrow end on one side and the wide end on the other. The wide end should hang lower because you will use it to create the knot.
1. How to Tie a Tie Using the Four-in-Hand Knot
The Four-in-Hand is one of the easiest tie knots to learn. It creates a relatively narrow, slightly asymmetrical knot that works well for many everyday business and smart-casual outfits.
It is a useful choice for beginners because its basic wrapping pattern is simple to remember. The finished appearance can vary depending on the thickness of the tie fabric and the width of the shirt collar.
Step-by-Step Instructions
Step 1: Position the tie.
Place the tie around your neck beneath the raised collar. Let the wide end hang on your right and the narrow end on your left, as seen in the mirror. Position the wide end lower than the narrow end. The exact starting length depends on your height and tie length.
Step 2: Cross the wide end over.
Bring the wide end across the front of the narrow end to form an X shape just below your collar.
Step 3: Wrap it behind.
Move the wide end behind the narrow end, passing it around toward the other side.
Step 4: Wrap it across the front again.
Bring the wide end across the front of the knot. This creates the front loop through which the tie will eventually pass.
Step 5: Bring the wide end up.
Lift the wide end behind the knot and bring it upward through the space between the tie and your neck.
Step 6: Pass it through the front loop.
Hold the front loop loosely with one finger, then guide the wide end down through that loop.
Step 7: Tighten and adjust.
Hold the narrow end and slide the knot upward gently. Straighten the knot, center it beneath your collar, and make sure the wide end hangs in front.
If the knot looks uneven, loosen it slightly and adjust the fabric before tightening it again.
Best for: Everyday office wear, business-casual outfits, standard button-down shirts, and anyone learning how to tie a tie for the first time.
2. How to Tie a Half Windsor Knot
The Half Windsor creates a more balanced, triangular knot than the Four-in-Hand. It is a versatile option for business meetings, interviews, presentations, and occasions when you want a slightly more formal appearance.
Although it involves additional wrapping movements, the Half Windsor is manageable once you understand the basic technique.
Step-by-Step Instructions
- Position the tie: Place the tie around your neck with the wide end longer than the narrow end. Start with the front of the tie facing outward.
- Cross the wide end: Bring the wide end across the front of the narrow end.
- Bring it behind: Move the wide end behind the narrow end toward the opposite side.
- Bring it up through the neck loop: Lift the wide end and pass it upward through the opening between your neck and the tie.
- Bring it down: Pull the wide end downward on the same side to create the first part of the knot.
- Wrap across the front: Bring the wide end horizontally across the front of the developing knot.
- Bring it up again: Pass the wide end behind the knot and upward through the neck loop.
- Pass it through the front loop: Guide the wide end down through the loop created across the front.
- Tighten the knot: Hold the narrow end and slide the knot gently toward your collar. Center it and smooth the fabric.
When Should You Choose the Half Windsor?
Choose a Half Windsor when you want a medium-sized, relatively symmetrical knot. It pairs well with many standard and moderately spread shirt collars. The finished size depends on the tie's fabric, thickness, and width.
3. How to Tie a Full Windsor Knot
The Full Windsor, sometimes called the Double Windsor, produces a wide, symmetrical triangular knot. It is a popular option for formal occasions, presentations, and shirts with wider-spread collars.
This knot requires more fabric and more steps than the Four-in-Hand. You may need to start with the wide end hanging noticeably lower to ensure that the finished tie reaches the correct length.
Step-by-Step Instructions
- Set the starting position: Place the tie around your neck with the wide end hanging lower than the narrow end. Keep enough length available for the larger knot.
- Cross the wide end over: Bring the wide end across the narrow end to form the beginning of the knot.
- Bring it up through the neck loop: Pass the wide end upward through the opening between the collar and the tie.
- Bring it down: Pull the wide end downward to one side.
- Wrap around the back: Move the wide end behind the narrow end toward the opposite side.
- Bring it up again: Pass the wide end upward through the neck loop from the other side.
- Pull it down: Bring the wide end down and gently tighten this wrapping.
- Wrap across the front: Move the wide end horizontally across the front of the developing knot.
- Pass it upward once more: Bring the wide end behind the knot and upward through the neck loop.
- Complete the knot: Pass the wide end down through the front loop.
- Adjust the finish: Hold the narrow end and gently slide the knot toward your collar. Center the knot and smooth both sides.
When Is a Full Windsor Best?
A Full Windsor is a good choice when you want a larger, more symmetrical knot that fills the space between wider collar points. Because it uses more fabric, check the final tie length before leaving home.
4. Which Tie Knot Should You Choose?
The best knot depends on the look you want, the type of shirt you are wearing, and the thickness of your tie. You do not need to learn every knot to dress well. For most everyday situations, the Four-in-Hand and Half Windsor are practical starting points.
| Tie Knot | Appearance | Best Use | Difficulty |
|---|---|---|---|
| Four-in-Hand | Slim and slightly asymmetrical | Daily wear and business casual | Easy |
| Half Windsor | Medium-sized and balanced | Office wear, interviews, and meetings | Moderate |
| Full Windsor | Wide and symmetrical | Formal events and wider collar styles | Moderate to challenging |
5. How Long Should a Tie Be?
After tying your knot, check the position of the wide end. As a general styling guideline, the tip of a properly tied necktie should reach around the top or middle of your belt buckle.
The exact position depends on your body proportions, tie length, and how the knot is tied. A larger knot generally uses more fabric than a smaller knot, so you may need to adjust the starting position before tying.
Tips for Getting the Length Right
- Start with the wide end lower than the narrow end.
- If the finished tie is too short, begin again with the wide end hanging lower.
- If the finished tie is too long, start with the wide end slightly higher.
- Remember that the Full Windsor usually consumes more fabric than the Four-in-Hand.
- Consider an extra-long tie if regular ties consistently finish too short for your height or preferred knot.
It may take two or three attempts to find the right starting length for your height and preferred knot. Once you discover the correct position, it becomes easier to repeat the result.
6. How to Make Your Tie Knot Look Neat
A good tie knot is not only about following the steps. Small adjustments can make the finished result look cleaner and more professional.
Create a Small Dimple
A dimple is a small indentation in the fabric just below the knot. To create one, gently pinch the fabric near the center of the wide end while tightening the knot. Keep the pinch in place as you slide the knot upward.
The dimple is optional. A smooth tie can look perfectly appropriate, and the result depends on the tie's material and construction.
Keep the Knot Centered
Once the knot is tightened, look in the mirror and check that it sits between the collar points. If one side is higher than the other, loosen the knot slightly, straighten the fabric, and adjust it again.
Avoid Pulling Too Hard
Pulling the tie too tightly can wrinkle the fabric and make the knot difficult to adjust. Tighten it enough to sit comfortably against the collar while allowing you to breathe and move normally.
Match the Knot to Your Shirt Collar
A slim knot can work well with a narrow or standard collar, while a larger knot can fill more space between wider collar points. The goal is to create a balanced appearance rather than choosing the largest knot possible.
7. Common Tie-Tying Mistakes and How to Fix Them
| Common Mistake | How to Fix It |
|---|---|
| The tie is too short. | Start again with the wide end lower before making the knot. |
| The tie is too long. | Start again with the wide end slightly higher. |
| The knot looks uneven. | Loosen it slightly, straighten the fabric, and tighten it again. |
| The knot is too bulky. | Try a Four-in-Hand or a thinner tie fabric. |
| The knot is too small for the collar. | Try a Half Windsor or Full Windsor, depending on the tie fabric. |
| The tie keeps loosening. | Check that the wide end passes through the front loop correctly and tighten the knot gently. |
8. Frequently Asked Questions
What is the easiest way to tie a tie?
The Four-in-Hand is a good starting point for beginners. It uses a relatively simple wrapping pattern and creates a slim, slightly asymmetrical knot suitable for many everyday outfits.
How do you tie a tie step by step for beginners?
Place the tie around your neck with the wide end longer, cross it over the narrow end, wrap it around, bring it through the neck loop, and pass it down through the front loop. Tighten gently and adjust the knot beneath your collar.
Which tie knot looks the most professional?
The Four-in-Hand, Half Windsor, and Full Windsor can all look professional when tied neatly. The best choice depends on your shirt collar, tie fabric, and the formality of the occasion.
Should a tie reach the belt buckle?
As a general guideline, the tip of the wide end should reach around the top or middle of the belt buckle. Your body proportions and the style of your outfit can affect the ideal position.
Is a Half Windsor better than a Full Windsor?
Neither knot is always better. The Half Windsor creates a medium-sized, balanced knot, while the Full Windsor produces a wider and more symmetrical finish. Choose the one that works best with your collar and tie.
Can I tie a tie without looking in a mirror?
Yes, but it is easier to learn while using a mirror. After you have practiced the same knot several times, you may be able to tie it by feel. Check the finished knot and tie length before leaving.
How do I loosen a tie without untying it completely?
Hold the knot and carefully slide it downward while keeping the narrow end steady. Avoid pulling the fabric sharply, as this may wrinkle or damage the tie.
Should I untie my tie after wearing it?
Yes. Carefully loosen and untie the knot instead of pulling the narrow end through it. This helps reduce unnecessary strain on the fabric and makes it easier to store the tie neatly.
Official and Further Reading Resources
For additional knot instructions and visual demonstrations, these resources provide step-by-step guidance:
- Four-in-Hand Knot Instructions — a beginner-friendly knot with a slim finish.
- Half Windsor Knot Instructions — a medium-sized, triangular knot.
- Full Windsor Knot Instructions — a wider, symmetrical knot for formal styling.
- Tie-a-Tie Knot Guide — an overview of additional necktie knot styles.
Final Thoughts
Learning how to tie a tie step by step does not require special skills. Begin with the Four-in-Hand knot, practice the movements in front of a mirror, and adjust the final length so the tie reaches around your belt buckle.
Once you are comfortable with the basic technique, try the Half Windsor for a more symmetrical appearance or the Full Windsor for a wider knot. With a little practice, you can choose the right style for work, interviews, weddings, and other formal occasions.
Disclaimer: Tie-knot appearance and finished length can vary with fabric thickness, tie width, body proportions, and shirt-collar design. The instructions in this guide are general styling recommendations.